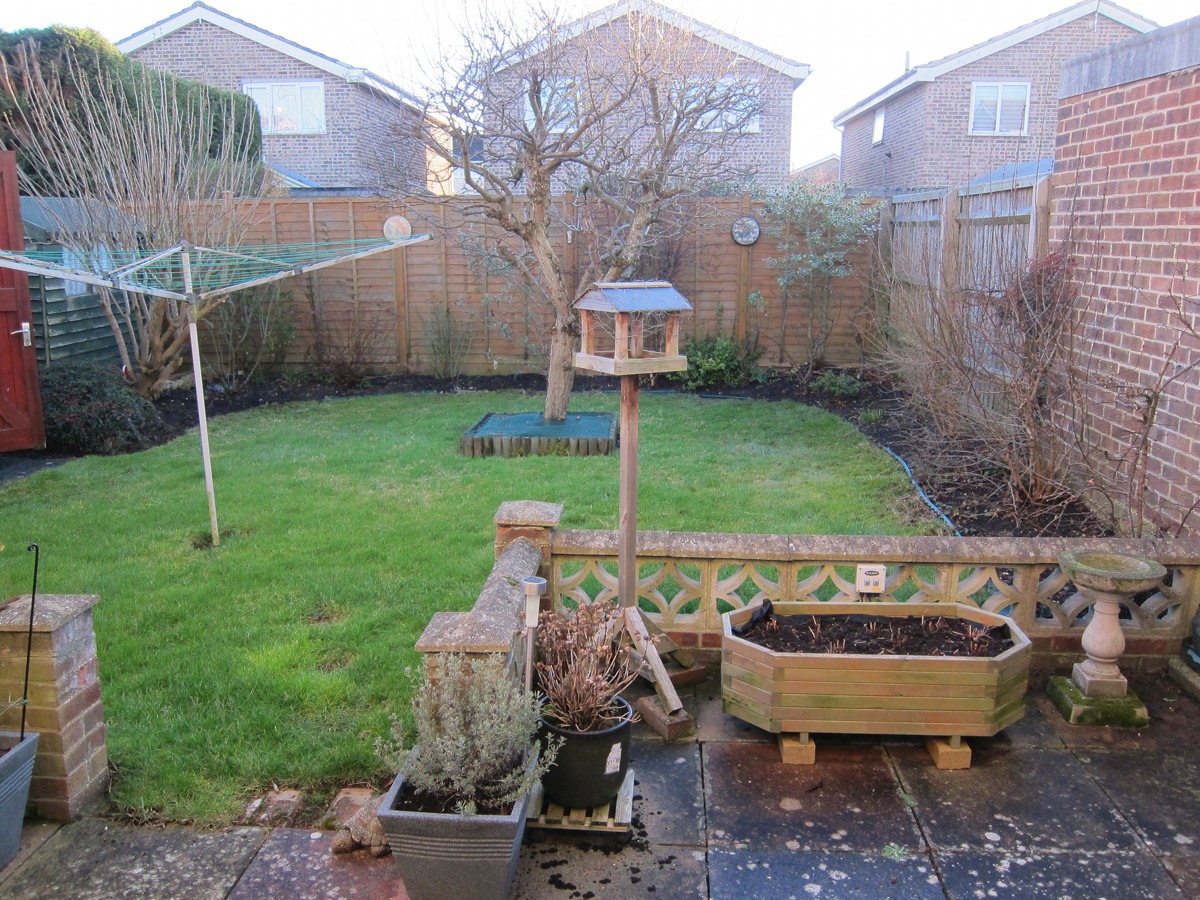
Here are two images taken a few minutes apart to illustrate the (subtle) differences in colour that can be achieved by changing just a few settings (if the camera has these capabilities). The first is made with the camera in full Auto mode; the second by taking more control of the exposure (reduced by 1/3 EV), the colour settings, and the Auto White Balance. Note how generally blue and contrasty the first picture is (windows and barge boards in the background), with a redder door (on the left) and brickwork (on the right). The second photo looks closer to true to life to me. (I say closer, because the grass actually has more yellower patches in reality. I put this down to the way the sensor interpolates pixels...)
 My general criticism of digital camera colour is that it is "overcooked" by the manufacturers, as that is what they believe that most consumers prefer. (This may explain why some enthusiasts have returned to film.) Where I have the facility to adjust things on my cameras, I solve this by reducing the colour saturation and contrast to suit. As with sustained loud noise, over-saturated colour becomes tiring after a while -- like a badly-adjusted TV.
I follow Ken Rockwell's advice and usually set my camera to Program mode, which I use for the majority of my photos. This setting allows me to adjust the exposure and ISO if I need to, but most of the time I am happy to let the camera choose most of the parameters for me. This includes White Balance, which is normally set to Auto. (Note that Ken Rockwell is an artist, and likes his colour saturation set to bonkers for his images -- what works in sunny California may not have the same effect in the frequently overcast and more northerly UK!)
The trick then -- if necessary and the camera controls permit it -- is to adjust Auto White Balance (AWB) to give pleasing results in daylight. The correct White Balance (whether white objects are truly white) depends on the colour temperature of the light, and it can change according to the time of day and the weather. Digital cameras often have a number of fixed settings that can be used, but it is more convenient to get the camera to set this automatically. However, I have found that the AWB setting can often result in a slight colour cast, especially on older cameras.
Cameras with enthusiast features usually have a means of adjusting the colour bias in the Auto White Balance. A blue cast can be corrected by increasing the amber level and a magenta cast can be corrected by increasing the green level. Conversely, amber can be reduced by increasing the blue level and green can be reduced by increasing the magenta level. Blue and amber are two ends of one setting, and magenta and green the other. The two settings can be used in combination.
To adjust the Auto White Balance, I choose a daylit subject and first use Custom White Balance to take a photo with what should be the correct balanced colours. I then change to AWB and take a similar photo. I now compare the two photos using a computer monitor and decide which AWB settings need to be changed, make the adjustment(s), and then repeat the photo-taking process until I cannot distinguish between the Custom and AWB images. I then make a note of the AWB correction, e.g., (A4, G2) for future reference. This can be a slow process, but I feel that the improvement in image colour is worth it.
For the record, in the second photograph my Canon PowerShot S95 was set to Custom Color with Contrast = -1, Saturation = -2, Sharpness = +1 and AWB (A5, G3).